Build

Module Dimensions
The module has the following dimensions currently. PVC card dimensions are used in the OpenScad design to create the module.
depth = 109.55 mm
width = 59.98 mm
height = 152.2 mm
Needed Components
| Reference | Qty | Description | Cost Home Made (€) | Cost Parts (professional) |
|---|---|---|---|---|
| FLIP-1-3D1 | 1 | Stator | 2 | 5€ / per 20 parts |
| FLIP-1-3D2 | 1 | Rotor - 1 (front) | 2 | 5€ / per 20 parts |
| FLIP-1-3D3 | 1 | Rotor - 2 (Back) | 2 | 5€ / per 20 parts |
| FLIP-1-3D4 | 1 | Support for sustain the display | 3 | 10€ / per 20 parts |
| FLIP-1-CARDS | 6 | Flip cards (6 * 2) half cards | 30€ per 500 cards | |
| FLIP-1-MOTOR_CMD | 1 | 28byj-48 - module with command card (LN218) | 4 € each | |
| FLIP-1-SWITCH | 1 | Homing switch | 2 € each | |
| FLIP-1-BOARD | 1 | Electronic Board | 5 € |
Vinyl letters :
https://www.amazon.com/dp/B079HJRG1X/ref=sspa_dk_detail_0?pd_rd_i=B077KDX4NR&th=1
(2 inch)
3D model
Model is build with OpenScad, permitting to create parametric models, this is really usefull for optimization and alternatives.
There are 4 main parts, this is monted as illustrated below

The module structure:

The rotor in 2 parts,


And the stator for the mounting elements :

And for card fix :

All Parts Printed result :

Electronic Card
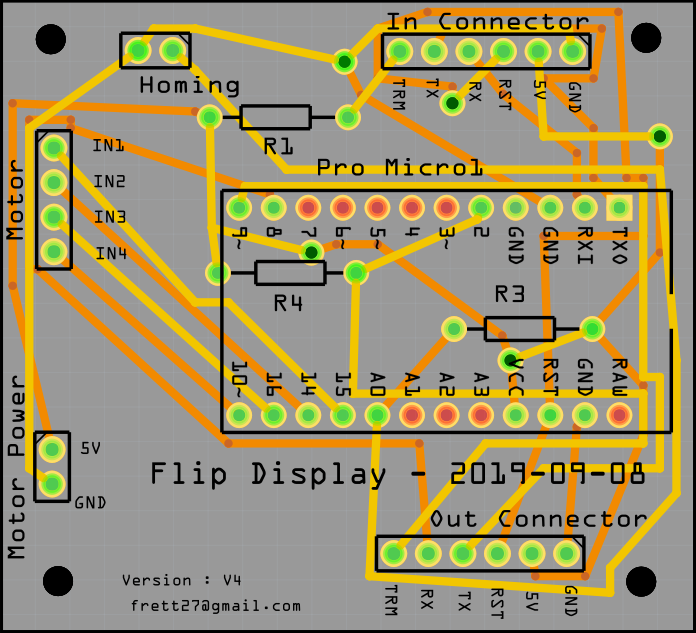
Electronic card is composed of a leonardo microchip, this chip handle the motor, homing, and communication. And external USB connected unit gives the numbers to display.
A lonely electronic card is hosted in the display.

How to mount flip display
Step 1 : solder the switch,

Step 2 : Mount motor on stator :

Step 3 : Switch mounting

Put the stator into the mounted rotor and fix them on the support using the 2 skrews. Take caution of the cable there is calculated space to not make the cable be damaged.

The final result with no box:
